
Pie Carrier Sewing Pattern

If you are looking for a creative and simple sewing project, the Easy Charm Pack Tote Tutorial is the perfect place to start. Learning to make a tote bag using charm packs is not only fun but also incredibly rewarding.
The Easy Charm Pack Tote Tutorial is designed for beginners and experienced sewists who want to create something practical and stylish. Throughout this step-by-step guide, we will explore every detail to help you master this project confidently.
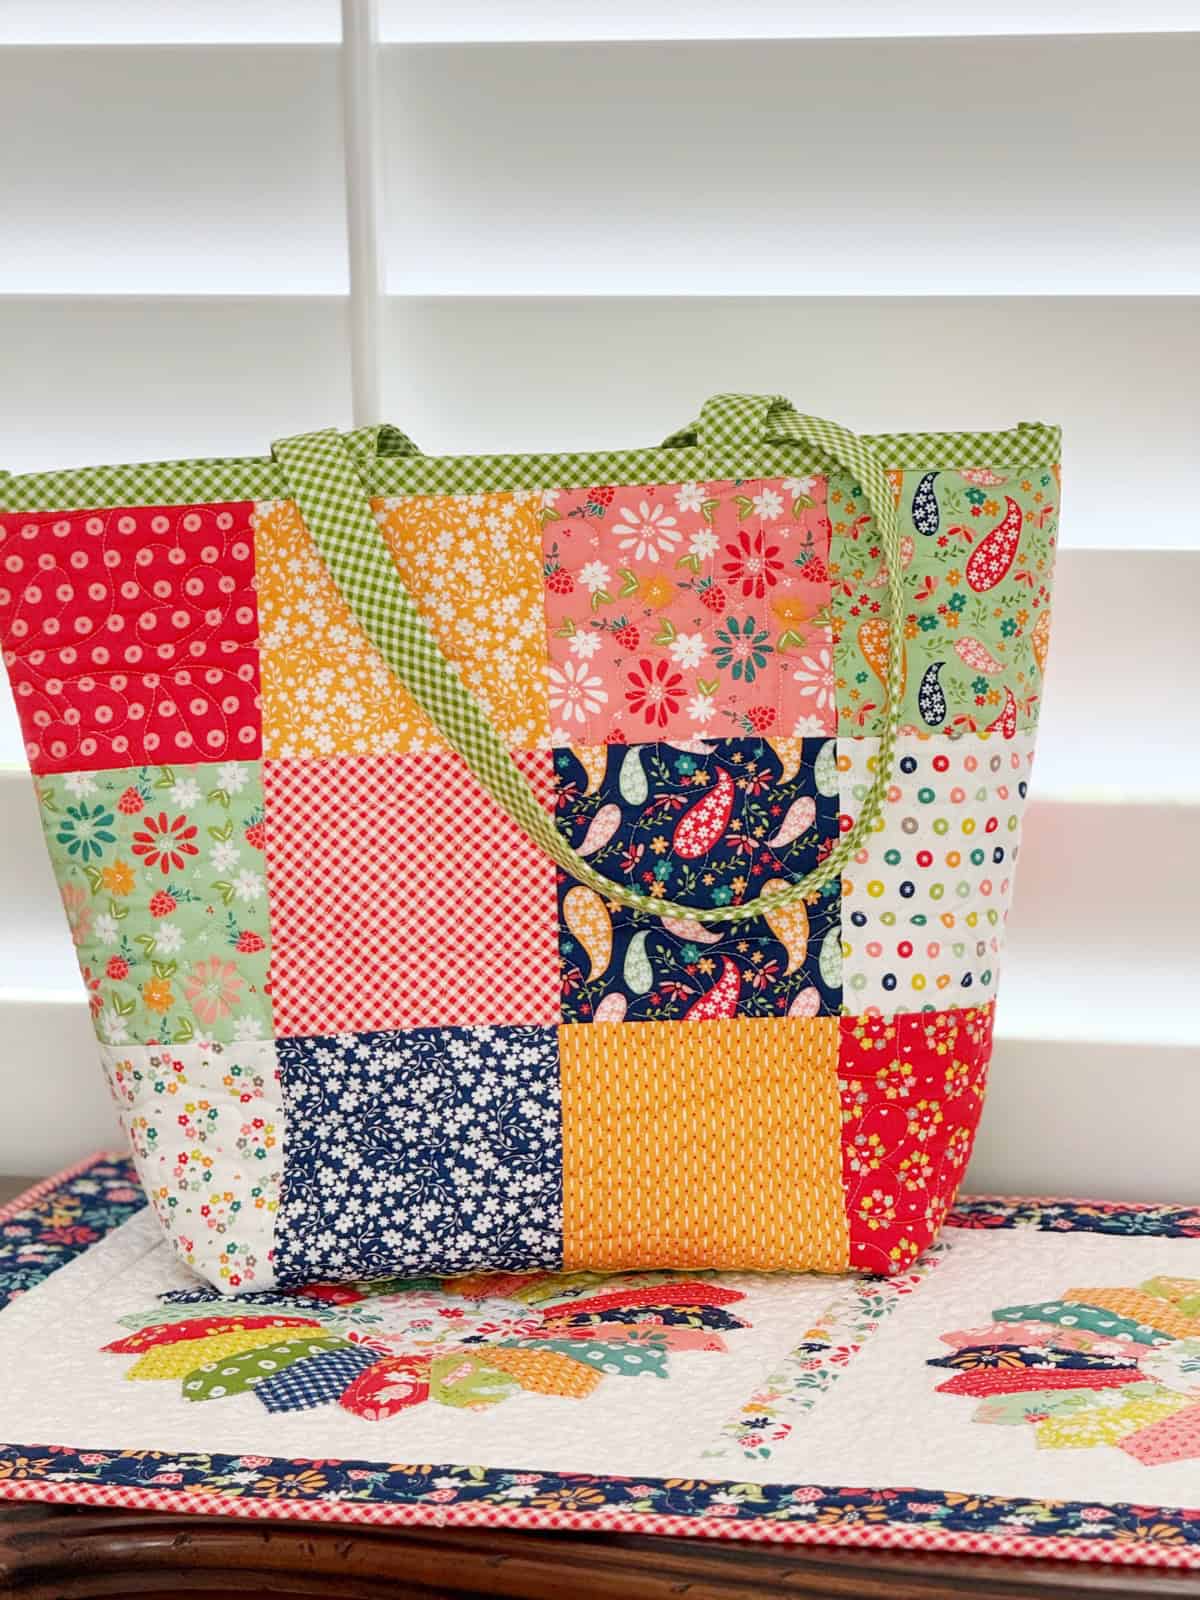
The Easy Charm Pack Tote Tutorial focuses on using pre-cut charm packs, which are typically 5-inch fabric squares. These charm packs make it easy to mix and match different fabric patterns, creating a beautiful and unique tote bag.
Whether you want to make a tote for yourself, as a gift, or even to sell, this tutorial provides all the guidance you need.
One of the best things about the Easy Charm Pack Tote Tutorial is its versatility. You can choose fabrics that reflect your personal style, whether that’s bright florals, modern geometric prints, or soft pastels.
This tutorial will walk you through the entire process, from selecting your charm packs to adding the final stitches. By following this Easy Charm Pack Tote Tutorial, you will feel confident creating a practical and beautiful bag.
Before starting your project, it is essential to gather all the materials you will need for the Easy Charm Pack Tote Tutorial. Having everything prepared will make the process smoother and more enjoyable.
You will need one charm pack for the body of the tote. A charm pack usually contains 42 pieces of 5-inch fabric squares, which is perfect for this project. Choosing colors and patterns that complement each other will make your tote stand out.
In addition to the charm pack, you will need lining fabric. The lining fabric should be durable and match the charm pack’s color palette. Cotton or canvas works well for lining, providing both support and a clean finish inside the tote.
You will also need fusible interfacing to give your tote bag structure. The interfacing helps the bag maintain its shape and adds strength, making it more suitable for everyday use.
Sturdy handles are another key material for the Easy Charm Pack Tote Tutorial. You can use pre-made cotton webbing handles or sew your own fabric handles using matching or contrasting fabric.
Gather basic sewing tools like scissors, pins, sewing machine, matching thread, and an iron. Preparing these tools in advance ensures you can focus on creating your beautiful tote without interruptions.
With all materials ready, you can now move to the next steps of the Easy Charm Pack Tote Tutorial and start assembling your charming tote bag.
The second step in the Easy Charm Pack Tote Tutorial involves preparing and arranging your charm packs. This is where creativity comes to life, as you get to design the layout of your tote bag.
Start by selecting the charm squares you want to use for the front and back of the tote. Lay them out on a flat surface to experiment with different color combinations and arrangements until you find the look you love.
Typically, the Easy Charm Pack Tote Tutorial recommends arranging the charm squares in a grid pattern. A 3×4 layout (three squares across and four squares down) for each side of the tote is a popular choice.
Once you are satisfied with the layout, begin sewing the charm squares together. Sew each row first, then sew the rows together to create one cohesive fabric piece. Repeat this process for the back of the tote.
After sewing, press the seams open or to one side using an iron. Pressing is essential in the Easy Charm Pack Tote Tutorial because it keeps your work neat and helps the tote hold its shape.
If you like, you can add topstitching along the seams for an extra decorative touch. This step is optional but adds durability and a professional finish to your tote.
Now that the charm pack panels are complete, you are ready to assemble the rest of your tote bag following the Easy Charm Pack Tote Tutorial steps.
Assembling the tote is a crucial part of the Easy Charm Pack Tote Tutorial. This is where your project begins to take its final shape.
Start by cutting your lining fabric to match the size of your assembled charm pack panels. You will need two lining pieces, one for the front and one for the back of the tote.
Next, apply fusible interfacing to the wrong side of each charm pack panel. Follow the manufacturer’s instructions to ensure proper adhesion. This will provide the necessary structure for your tote bag.
Place the front and back panels right sides together and pin along the sides and bottom. Sew these edges using a 1/4 inch seam allowance, leaving the top open as per the Easy Charm Pack Tote Tutorial instructions.
Repeat the same steps with the lining pieces, but remember to leave a small opening at the bottom to turn the tote right side out later.
Create boxed corners for both the outer bag and the lining. This step gives the tote bag its depth and allows it to stand up on its own. Measure and sew across the corners according to the Easy Charm Pack Tote Tutorial guidelines.
Once both the outer bag and lining are ready, insert the outer bag into the lining with right sides facing each other. Pin along the top edge, ensuring that the side seams align perfectly.
We are now in the final phase of the Easy Charm Pack Tote Tutorial. Adding the finishing touches will bring your project to completion and make your tote bag ready for use.
Sew around the top edge of the tote bag with a 1/4 inch seam allowance. This step secures the lining and the outer bag together. After sewing, turn the bag right side out through the opening in the lining.
Close the opening in the lining by sewing a small, neat stitch. Push the lining inside the tote and smooth out the edges to ensure a perfect fit, following the steps outlined in the Easy Charm Pack Tote Tutorial.
Topstitch around the upper edge of the tote bag. This provides extra durability and creates a polished, professional look that is a hallmark of the Easy Charm Pack Tote Tutorial.
Now it’s time to attach the handles. Measure carefully to ensure they are even on both sides. Pin the handles in place and sew securely with reinforced stitching, as recommended in the Easy Charm Pack Tote Tutorial.
Give the entire tote a final press with the iron to smooth out any wrinkles and set the stitches. The bag should now look crisp and beautiful.
Congratulations! You have successfully completed the Easy Charm Pack Tote Tutorial and created a lovely, handmade tote bag that is both functional and stylish.
1. What is a charm pack and why is it used in this tutorial?
A charm pack is a bundle of pre-cut 5-inch fabric squares. It is used in the Easy Charm Pack Tote Tutorial because it simplifies the cutting process and offers a variety of fabric patterns in one pack, making the project faster and more visually appealing.
2. Can beginners follow the Easy Charm Pack Tote Tutorial?
Yes, the Easy Charm Pack Tote Tutorial is beginner-friendly. It provides clear step-by-step instructions, making it easy for those new to sewing to create a beautiful tote bag successfully.
3. What type of fabric is best for the lining?
Cotton or canvas is recommended for the lining in the Easy Charm Pack Tote Tutorial because these fabrics provide durability and structure, helping the tote maintain its shape.
4. How can I personalize my tote bag?
You can personalize your tote by selecting charm packs with your favorite colors or patterns. You may also add embellishments like buttons, embroidery, or decorative stitching to make your bag unique.
5. Do I need to use fusible interfacing?
Yes, fusible interfacing is essential in the Easy Charm Pack Tote Tutorial. It gives the tote bag structure and support, helping it to stand upright and hold its shape during use.
6. How long does it take to complete the Easy Charm Pack Tote Tutorial?
Depending on your sewing experience, the Easy Charm Pack Tote Tutorial can take approximately 2-4 hours to complete. Beginners may take a little longer as they familiarize themselves with the steps.
Throughout this Easy Charm Pack Tote Tutorial, we explored each step from gathering materials to adding the final touches. We covered how to select and arrange charm packs, assemble the tote, and complete it with professional finishing techniques. This project is perfect for all sewing levels, offering creativity, practicality, and satisfaction.
I hope you found this Easy Charm Pack Tote Tutorial helpful and inspiring. I would love to hear your honest opinion and any suggestions you have. Feel free to share your thoughts and experiences in the comments!


