
Crochet Multi-Purpose Blouse, Shawl, Runner Model

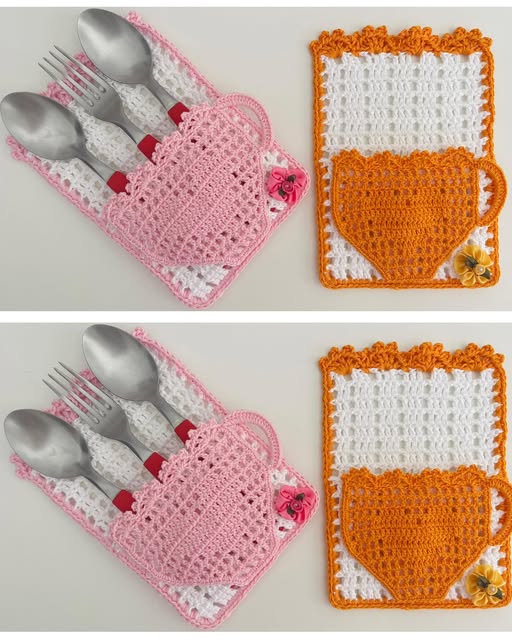
The Crochet Cutlery Holder – Free Pattern is a delightful and practical project for crochet lovers who want to add a handmade touch to their table settings.
Whether you’re preparing for a family dinner, a picnic, or a festive celebration, a crochet cutlery holder can bring charm and organization to your place settings. This project is beginner-friendly, quick to complete, and an excellent way to use up yarn scraps.
In this guide, we’ll explore how to create a stylish and functional crochet cutlery holder from scratch. The pattern is designed to be easy enough for beginners, but customizable enough to satisfy seasoned crafters.
We will also offer tips for styling, variations you can try, and answers to common questions from the crochet community.
The best part about this Crochet Cutlery Holder – Free Pattern is that it makes a lovely handmade gift or craft fair item. With a few simple stitches, some basic tools, and a bit of creativity, you’ll have a beautiful piece that elevates your table decor while keeping everything in its place. Let’s dive into the steps to make your own today!
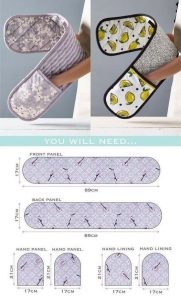
To begin your Crochet Cutlery Holder – Free Pattern, gather your materials in advance. Having everything ready will make the process smoother and more enjoyable.
You’ll need medium-weight (worsted) cotton yarn, which is durable and machine washable. Cotton yarn is preferred for table accessories as it holds its shape well and is easy to clean. You can go with classic white for a minimalist look or vibrant colors for a festive theme.
Use a crochet hook size H/8 (5 mm) or the size that gives you a firm fabric with your chosen yarn. A tighter gauge is better for this project, as it provides the structure needed to hold utensils securely.
You’ll also need scissors, a yarn needle for weaving in ends, and optional decorative elements like buttons, appliqués, or ribbons. If you want to add extra charm, consider small floral or seasonal motifs.
Print or sketch your pattern plan before you begin. While this is a free pattern, organizing your steps ahead of time helps avoid mistakes and saves time later on.
Finally, make sure to have a measuring tape handy. Keeping the size of your holder consistent ensures your cutlery fits perfectly without sliding out or stretching the fabric.
Start with a slip knot and chain 21. This base chain creates the width of your holder. Feel free to adjust the number based on the size of your utensils.
Single crochet in the second chain from the hook and in each chain across. You should have 20 stitches. Chain 1 and turn. Continue single crocheting each row until the piece measures about 7 inches long.
To create the pocket, fold the bottom up about 3.5 inches and pin in place. Slip stitch or whip stitch the sides together using the same yarn. This creates a secure pocket where your utensils will sit.
Once the pocket is stitched, add a decorative edging to the top of the holder. A simple shell stitch works well here. For example: (5 double crochets in one stitch, skip one stitch, single crochet in the next) across the top.
If desired, attach a button or a crochet flower to the flap or edge. This adds a unique touch to your project. You can also personalize it with embroidery or color patterns.
Weave in all loose ends using a yarn needle. Block the piece by dampening it slightly and pinning it to shape. Let it dry flat for a clean and crisp look.
The Crochet Cutlery Holder – Free Pattern is incredibly versatile. You can easily adapt the color and embellishments to suit different occasions and decor styles.
For a rustic farmhouse vibe, choose neutral tones like beige, cream, and light gray. Add wooden buttons or lace trims for extra charm.
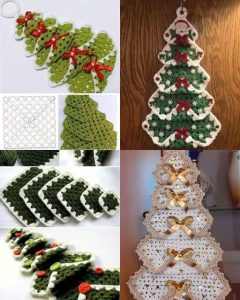
During holidays, use seasonal colors. Try red and green for Christmas, pastel shades for Easter, or rich autumnal tones for Thanksgiving. Themed appliqués like snowflakes or pumpkins can add festive flair.
For weddings or romantic dinners, consider soft pinks, ivory, and metallic threads. A small satin ribbon tied around the holder elevates its elegance.
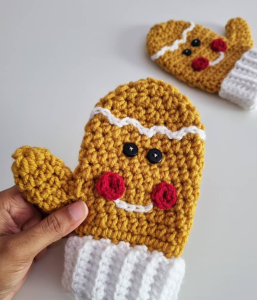
If making them for a child’s party or picnic, go bright and playful. Use fun motifs like stars, animals, or fruit shapes for a whimsical look.
To coordinate with existing kitchen decor, match your holder to placemats or tablecloths. This cohesive approach adds visual harmony to the dining area.
You can even make a set of holders in different colors for each guest, adding a personal touch and making it easier for everyone to keep track of their utensils.
If you’re new to crochet, the Crochet Cutlery Holder – Free Pattern is a great place to start. It uses basic stitches and simple assembly, making it beginner-friendly.
Practice your tension before starting the final project. A consistent tension ensures your holder has the right structure and isn’t too floppy.
Try using a thicker yarn and a larger hook for a chunkier, faster version. Just adjust the number of chains to keep the proportions right.
Experiment with textures by alternating between single and half-double crochet rows. This can create a more visually interesting fabric.
You can also add a flap to fold over the top and secure it with a button or tie. This is helpful if you plan to transport the holders to a picnic or event.
Another idea is to crochet matching coasters or napkin rings using the same yarn and motif. A coordinated set makes a thoughtful gift or themed table decor.
What is the best yarn for a crochet cutlery holder? Cotton yarn is ideal for this project because it’s strong, washable, and holds its shape well. It’s also safe for kitchen use and easy to block for a polished finish.
How do I adjust the size of the pattern? To make your holder larger or smaller, simply increase or decrease the number of starting chains. Adjust the height by adding or removing rows accordingly.
Can I use acrylic yarn instead of cotton? While acrylic yarn is more readily available and cost-effective, it might not be as heat resistant or structured as cotton. Use acrylic only if the holder is for decorative use rather than daily kitchen use.
Is blocking necessary? Blocking helps your project lie flat and look more finished, especially if you’re using textured stitches or decorative edges. It’s highly recommended, but not absolutely necessary.
How long does it take to make one holder? Most crafters can complete a cutlery holder in under two hours, making this a quick and satisfying project. It’s perfect for crafting in batches.
Can I sell holders made from this free pattern? Yes, handmade items created using free patterns can generally be sold. Always credit the pattern source and ensure your items are handmade and not mass-produced.
The Crochet Cutlery Holder – Free Pattern is not only a practical project but also a delightful way to bring handmade charm to your table. From the simplicity of the stitches to the joy of personalization, this project is both accessible and satisfying. With basic tools and some creativity, you can make a variety of holders for any season or occasion.
We hope this article helped you understand the steps and possibilities of creating your own crochet cutlery holder. If you try this project, we’d love to hear your thoughts! Please leave a sincere opinion or suggestions below—your feedback helps improve our patterns and inspires fellow crocheters around the world.


