
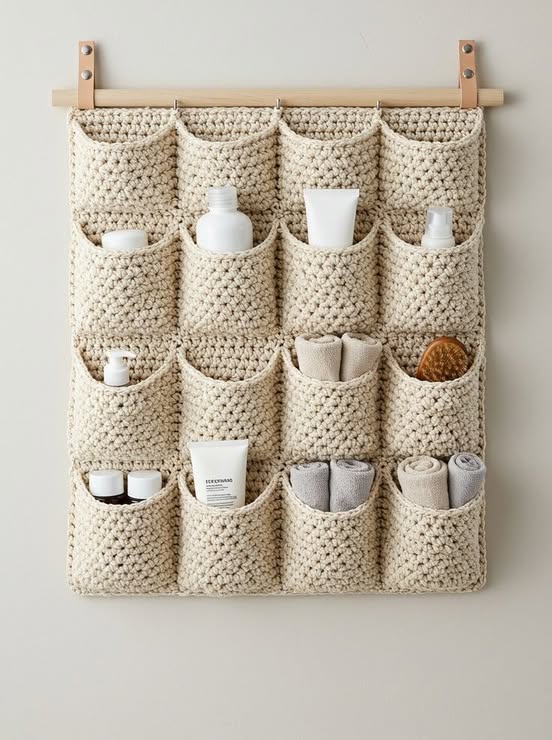
If you are looking for a functional and beautiful project, the Crochet Wall Hanging Organizer – Free Pattern is the perfect choice.
This pattern combines style and practicality, allowing you to create a handmade storage solution that also serves as a decorative piece for any room.
Whether you need a place to store craft supplies, keys, letters, or small household items, this organizer is both charming and useful.
The beauty of the Crochet Wall Hanging Organizer – Free Pattern is its versatility. You can easily adapt it to fit your home’s decor by choosing your favorite colors, yarn textures, and pocket sizes.
Plus, it’s an eco-friendly way to stay organized while adding a handmade touch to your space.
In this comprehensive guide, you will learn step-by-step how to make your own Crochet Wall Hanging Organizer – Free Pattern. From materials and tools to assembly tips and creative ideas, this tutorial is designed to help both beginners and experienced crocheters succeed.
1. Materials and Tools Needed for the Crochet Wall Hanging Organizer – Free Pattern
Before starting your Crochet Wall Hanging Organizer – Free Pattern, it’s important to gather all the necessary materials. Having everything ready will make your project smoother and more enjoyable.
The primary material is yarn. Cotton yarn is highly recommended for its durability and neat finish. It holds its shape well, which is essential for an item like an organizer that needs to be sturdy.
Choose a crochet hook that matches the weight of your yarn. Typically, a 4mm to 5mm hook works great for medium-weight cotton yarn, but you can adjust depending on the desired texture and size.
You will also need a wooden dowel or stick to hang the organizer. This gives structure to the top of your crochet piece and makes it easy to display on any wall.
Other useful tools include a yarn needle for sewing parts together and weaving in ends, scissors for cutting yarn, and stitch markers to help you track your rows or stitches.
Optional materials like buttons, beads, or leather straps can be used to embellish your organizer, adding personality and functionality, such as closures or decorative touches.
Lastly, having a tape measure or ruler will help you ensure that your pockets and overall dimensions are uniform, resulting in a polished and balanced final piece.
2. Step-by-Step Instructions for the Crochet Wall Hanging Organizer – Free Pattern
Now that your materials are prepared, let’s dive into creating the Crochet Wall Hanging Organizer – Free Pattern. This project is worked in sections, starting with the main body and then adding pockets.
Begin by crocheting the base rectangle. This is the foundation of your organizer and should be large enough to accommodate the number of pockets you want. A simple single crochet or half double crochet stitch works best for stability.
Work in rows until you reach the desired height. Keep your edges straight by using stitch markers or counting stitches regularly. This helps maintain a clean and professional look.
Once the main rectangle is complete, start making the pockets. You can create one large pocket or multiple smaller ones depending on your needs. Each pocket is simply a smaller rectangle crocheted separately.
Attach the pockets by sewing them onto the base using a yarn needle and matching yarn. Make sure to sew the sides and bottom securely while leaving the top open for functionality.
Add the wooden dowel at the top. Simply fold the top edge of your organizer over the dowel and sew it in place, creating a sleeve that holds the dowel securely.
Finish by adding any decorative elements, such as tassels, fringe, or buttons. You can also crochet loops at the top corners for easy hanging on hooks or nails.
3. Creative Design Ideas for Your Crochet Wall Hanging Organizer – Free Pattern
One of the joys of the Crochet Wall Hanging Organizer – Free Pattern is how easily it can be customized to match your personal style and needs. Let’s explore some creative ideas to inspire you.
Play with color combinations. You can use stripes, color blocks, or even gradient yarn to give your organizer a vibrant and unique look that matches your home decor.
Experiment with different stitch patterns. While simple stitches create a minimalist aesthetic, textured stitches like bobble, waffle, or basketweave can add dimension and interest.
Add labels or tags to each pocket. You can crochet small tags or use embroidery to label what each pocket holds, making your organizer even more functional.
Create themed organizers. For example, make a pastel-colored one for a baby’s room to store diapers and small toys, or use neutral tones for an entryway organizer to hold keys, wallets, and mail.
Consider the shape of the pockets. Instead of plain rectangles, try adding rounded corners, scalloped edges, or decorative motifs like flowers or stars to make your organizer stand out.
If you enjoy boho or rustic styles, add fringe, macrame elements, or natural wooden beads to the bottom or sides of your organizer. This simple touch elevates the overall design beautifully.
4. Tips for Success with the Crochet Wall Hanging Organizer – Free Pattern
While the Crochet Wall Hanging Organizer – Free Pattern is beginner-friendly, there are a few tips that can help ensure your project turns out exactly as you envision.
Choose sturdy yarn. Cotton yarn is ideal because it holds its shape better than softer yarns like acrylic, which can stretch over time, especially when pockets are filled.
Pay attention to tension. Consistent tension helps maintain a uniform size for your base and pockets, resulting in a cleaner and more professional appearance.
Measure carefully. Double-check your dimensions before sewing pockets to ensure they align properly. A crooked pocket can affect both the look and function of your organizer.
Reinforce the pockets if you plan to store heavier items. You can add a felt lining inside the pocket or double-crochet the pocket panel for extra strength.
Keep your stitches neat, especially along the edges. Crocheting a border around the entire base piece before attaching the pockets can give the project a framed, finished look.
Block your finished organizer. Lightly wet it, shape it to the desired size, and let it dry flat. Blocking helps even out stitches and gives your crochet organizer a polished final appearance.
FAQ – Crochet Wall Hanging Organizer – Free Pattern
What is the best yarn for a crochet wall hanging organizer?
Cotton yarn is the best choice because it is strong, durable, and holds its shape well. This makes it perfect for organizers that will carry weight.
How long does it take to make a crochet wall hanging organizer?
On average, it takes about 4 to 8 hours, depending on the size, stitch complexity, and number of pockets you choose to include.
Is the crochet wall hanging organizer suitable for beginners?
Yes, this project is beginner-friendly. It mostly uses simple stitches like single crochet or half double crochet, along with basic sewing techniques.
Can I customize the size and number of pockets?
Absolutely. The Crochet Wall Hanging Organizer – Free Pattern is highly customizable. You can adjust the base size and add as many pockets as needed for your space.
How do I hang the crochet wall organizer securely?
Attach a wooden dowel at the top of your crochet organizer and add loops or strings to the dowel for easy hanging on nails, hooks, or adhesive wall mounts.
Can I wash the crochet wall hanging organizer?
Yes, but hand washing is recommended, especially if it’s made with cotton yarn. Lay it flat to dry to maintain its shape and avoid stretching.
Conclusion
In this tutorial, you’ve learned how to create a Crochet Wall Hanging Organizer – Free Pattern, from gathering the right materials to following step-by-step instructions, exploring creative design ideas, and applying practical tips for success. This project is not only functional but also a beautiful way to express your creativity and add handmade charm to your space.
Whether you are organizing your craft room, entryway, kitchen, or kids’ bedroom, this crochet wall organizer offers a practical solution while showcasing your crochet skills. Plus, it’s a wonderful handmade gift idea for friends and family.
VIDEO TUTORIAL
I’d love to hear your thoughts on this pattern! Please leave your honest opinion and share any suggestions or questions in the comments. Your feedback is incredibly valuable and helps build a supportive and creative crochet community.


