
Pie Carrier Sewing Pattern

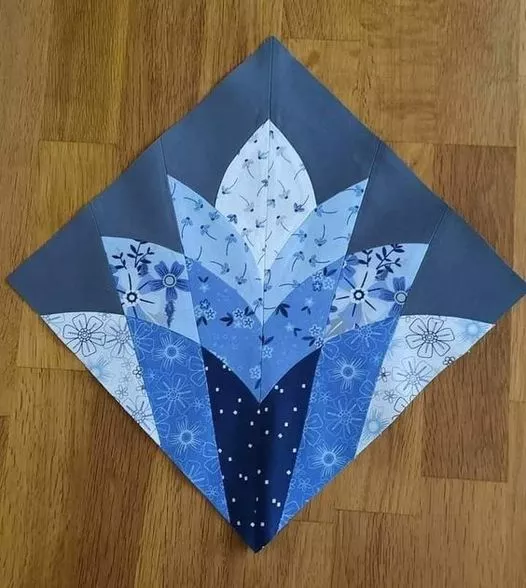
The Cleopatra’s Fan Quilt Pattern: A Timeless Design for Quilters of All Levels is a stunning and intricate quilt pattern that has captured the hearts of quilters for generations.
This elegant design features curved pieces that create a mesmerizing fan-like effect, reminiscent of the glamour and sophistication of ancient Egypt. Whether you are a beginner or an experienced quilter, this pattern offers a rewarding challenge with breathtaking results.
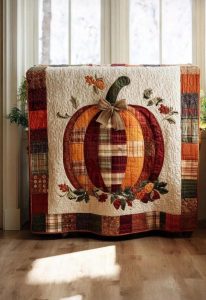
The beauty of the Cleopatra’s Fan Quilt Pattern lies in its versatility. With the right fabric choices, you can create a quilt that exudes vintage charm, modern elegance, or a vibrant burst of colors.
The curved piecing technique may seem intimidating at first, but with patience and the right guidance, you’ll find it to be an enjoyable and fulfilling experience.
In this guide, we will walk you through everything you need to know about the Cleopatra’s Fan Quilt Pattern—from selecting materials to sewing the curved pieces and finishing your masterpiece.
Whether you want to create a full-sized quilt or a decorative wall hanging, this step-by-step tutorial will help bring your vision to life.
Before you begin your Cleopatra’s Fan Quilt Pattern, gathering the right materials is crucial. Having all your supplies ready will make the quilting process smoother and more enjoyable.
Selecting high-quality fabric is essential for achieving a polished look. Choose cotton quilting fabric, as it is durable and easy to work with. You may opt for solid colors, patterned prints, or a mix of both to enhance the fan design.
Once you have gathered your materials, you’re ready to begin the exciting process of piecing together your Cleopatra’s Fan Quilt.
One of the defining features of the Cleopatra’s Fan Quilt Pattern is its beautiful curved piecing. While curves may seem daunting at first, following these steps will help you achieve smooth and professional-looking results.
Start by cutting your fabric pieces precisely using your rotary cutter and template. Accuracy is key to ensuring the curves fit together seamlessly.
By taking your time with the curved piecing, you’ll achieve a refined and seamless look for your Cleopatra’s Fan quilt.
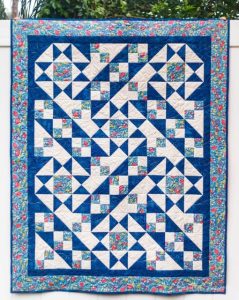
Once you’ve mastered sewing the curved pieces, it’s time to arrange and assemble your quilt blocks. The layout of the Cleopatra’s Fan Quilt Pattern can vary, depending on the look you want to achieve.
Start by laying out your blocks on a flat surface to visualize the final design. Play around with different arrangements before settling on your preferred pattern.
Once your quilt top is assembled, you’re ready for the final steps—adding batting, quilting, and binding.
Quilting and binding are the finishing touches that bring your Cleopatra’s Fan Quilt Pattern to life. These steps add texture, durability, and a professional finish to your quilt.
Choosing the right quilting technique can enhance the beauty of your quilt. Free-motion quilting, straight-line quilting, or hand quilting are all great options.
Once your binding is attached and secured, your Cleopatra’s Fan Quilt is complete and ready to be displayed or gifted.
Q1: Is the Cleopatra’s Fan Quilt Pattern suitable for beginners? A1: Yes! While curved piecing requires some practice, beginners can master it with patience and proper technique.
Q2: What size should a Cleopatra’s Fan Quilt be? A2: The size depends on your preference. It can range from a small wall hanging to a full-sized bed quilt.
Q3: Can I use pre-cut fabric for this pattern? A3: Yes, but you may need to adjust the template sizes accordingly.
Q4: How do I prevent puckering when sewing curves? A4: Pinning carefully and sewing slowly helps maintain smooth curves.
Q5: What colors work best for this pattern? A5: Contrasting colors highlight the fan design beautifully, but any palette can work.
Q6: Can I hand quilt a Cleopatra’s Fan Quilt? A6: Absolutely! Hand quilting adds a personal touch and enhances the quilt’s texture.
The Cleopatra’s Fan Quilt Pattern: A Timeless Design for Quilters of All Levels is a captivating project that blends history, elegance, and skillful craftsmanship. With its intricate curves and fan-like design, this quilt is a show-stopping piece that adds charm to any space.
By following this guide, you’ve learned about the essential materials, curved piecing techniques, block assembly, quilting methods, and binding. Now, it’s time to bring your own Cleopatra’s Fan Quilt to life!
We’d love to hear about your experience with this pattern. Share your thoughts, feedback, and any tips you’ve discovered along the way in the comments below!


