Cute Zipper Pouch Bag - Free Pattern

The Weathervane Quilt Block Pattern is a timeless and charming design that has been loved by quilters for generations. Its classic look, combined with its versatility, makes it a favorite choice for both beginners and experienced quilters.
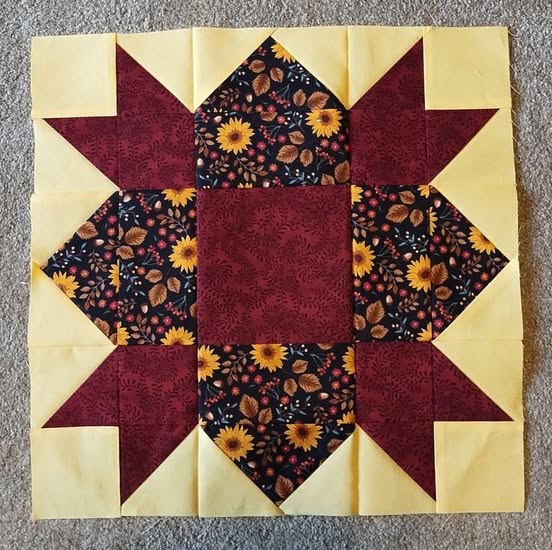
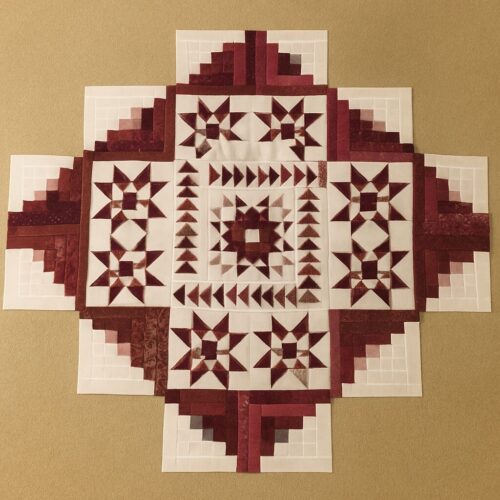
This pattern features a symmetrical layout that resembles the decorative weathervanes seen on rooftops, bringing a sense of tradition and elegance to any quilt project.
One of the reasons the Weathervane Quilt Block Pattern remains popular is its balanced structure and the ability to play with color combinations.
The block is typically made up of squares, half-square triangles (HSTs), and a center focal piece, offering a harmonious blend of geometry and creativity.
Whether you’re crafting a quilt for a loved one or adding to your own collection, this block provides endless possibilities.
In this article, we will explore how to create the Weathervane Quilt Block Pattern step by step. From choosing fabrics to cutting, piecing, and assembling, you’ll gain a comprehensive understanding of how to bring this beautiful design to life.
Plus, we’ll share useful tips, customization ideas, and answer the most frequently asked questions about this pattern.
The Weathervane Quilt Block Pattern is a traditional quilt block that dates back to the 1800s. Its name comes from its resemblance to the ornamental weather indicators placed atop barns and houses, symbolizing guidance and direction.
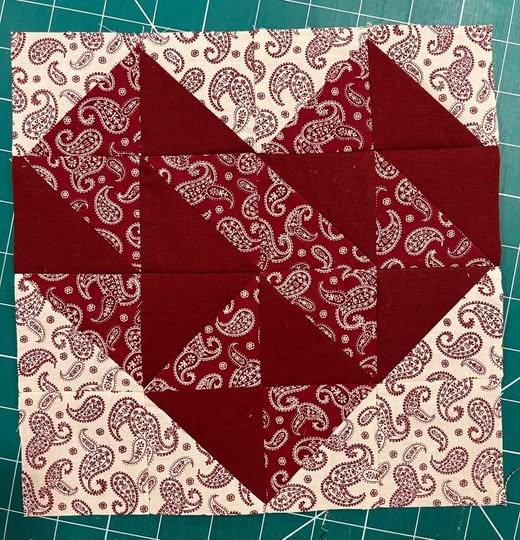
This pattern is known for its symmetrical design, which consists of a central square, surrounded by triangles and smaller squares. The layout creates a visual movement that draws the eye toward the center while maintaining a balanced, pleasing aesthetic.
One of the advantages of the Weathervane Quilt Block Pattern is its adaptability. You can use it as a single block for small projects like pillows or tote bags or combine multiple blocks for larger quilts with stunning visual impact.
The block typically works well with contrasting fabrics. Using a combination of light, medium, and dark tones enhances the visual appeal and defines the different elements within the block.
Quilters appreciate this pattern for its straightforward piecing techniques. Even though it looks intricate, it relies on basic units like half-square triangles and simple four-patch components, making it accessible to most quilters.
The Weathervane Quilt Block Pattern also offers a canvas for creativity. Whether you prefer modern fabrics, bold prints, or traditional florals, this block allows you to experiment while staying true to its classic roots.
Before you begin creating your Weathervane Quilt Block Pattern, gathering the right materials and tools is essential for a smooth quilting experience. Having everything prepared will ensure accuracy and efficiency throughout your project.
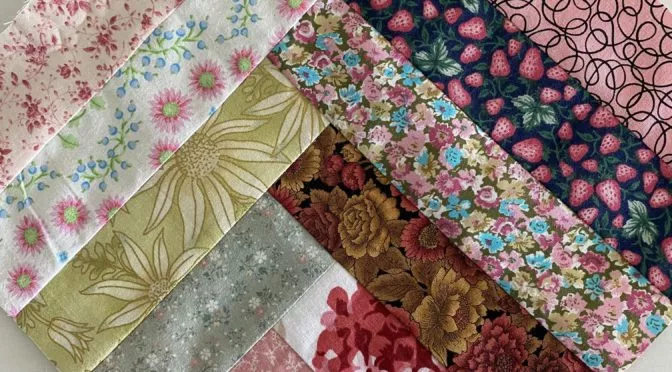
Start with fabric selection. Choose three to four complementary fabrics to highlight different areas of the block—background, center, triangles, and accents. High-contrast colors often work best to define the shapes clearly.
You’ll need basic quilting tools: a rotary cutter, self-healing cutting mat, and quilting rulers. A square ruler and a ruler designed for cutting triangles will be especially helpful for this pattern.
A reliable sewing machine with a consistent quarter-inch seam allowance is crucial. Precision matters in the Weathervane Quilt Block Pattern, as it ensures your pieces align perfectly during assembly.
Use high-quality cotton thread in a neutral color to avoid distracting from your fabrics. Pins, fabric clips, and a good iron for pressing seams will also be essential during the process.
Consider having starch or fabric sizing on hand. Lightly stiffening your fabric before cutting can prevent stretching and distortion, particularly when working with bias edges in half-square triangles.
Lastly, prepare your cutting plan. Review the finished size of your block and calculate the correct dimensions for each piece. Many quilters create a cutting checklist to stay organized as they prepare the various components of the Weathervane Quilt Block Pattern.
The process of assembling the Weathervane Quilt Block Pattern is both methodical and rewarding. With a combination of basic quilting techniques, this block comes together smoothly, even for quilters new to geometric designs.
Start with the center square. This piece acts as the focal point of the block and can feature a bold print, a fussy-cut motif, or a simple solid fabric depending on your design choice.
Next, prepare your half-square triangles (HSTs). These triangles form the dynamic outer edges of the block, creating the signature “weathervane” effect. Pair two contrasting squares, draw a diagonal line, sew on each side of the line, then cut to create two HSTs.
Once your HSTs are complete, press them carefully. Pressing seams toward the darker fabric or open, depending on your preference, helps reduce bulk and ensures sharp points when assembling the block.
Assemble the corner units. Each corner typically consists of an HST paired with squares, forming a cohesive and balanced frame around the center of the Weathervane Quilt Block Pattern.
Sew the units into rows. Align the corner units, center square, and side rectangles into three rows. Use pins to match intersections precisely, maintaining a clean and symmetrical look.
Finally, join the rows together. Press the seams flat or open as needed to minimize bulk, then give the completed block a final press. At this stage, you can admire how the pieces come together to form the striking Weathervane Quilt Block Pattern.
The Weathervane Quilt Block Pattern is highly versatile, offering countless opportunities for customization. Whether your style leans traditional, modern, or somewhere in between, this block adapts beautifully to different aesthetics.
Experiment with color placement. Swapping the light and dark fabrics in different areas of the block can dramatically change the look, emphasizing different shapes and adding visual interest.
Try using patterned fabrics for the center square to create a focal point that draws attention. A fussy-cut motif, such as a flower or animal, adds a personalized touch to the Weathervane Quilt Block Pattern.
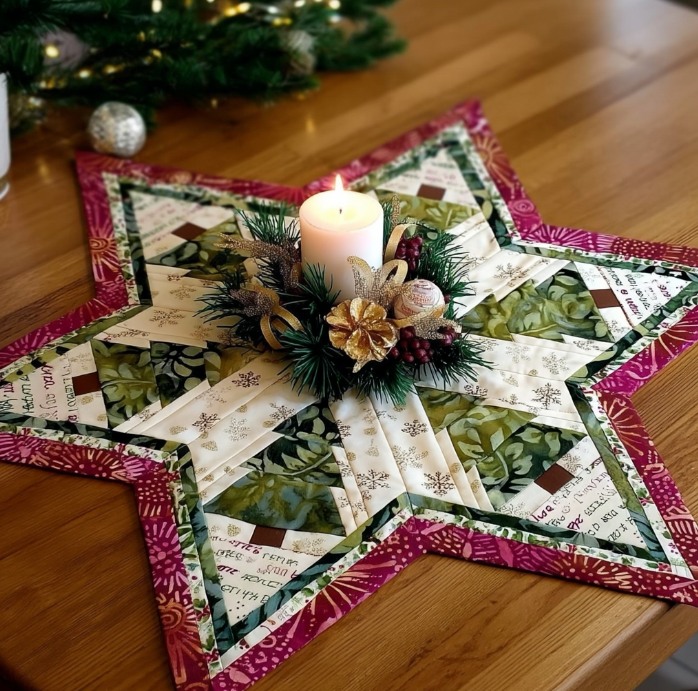
Vary the scale of your block. Making larger blocks can speed up quilt assembly for big projects, while smaller blocks are perfect for detailed mini quilts or decorative items like cushions and table runners.
Mix and match the Weathervane Quilt Block Pattern with other classic quilt blocks. It pairs beautifully with nine-patch, churn dash, or sawtooth star blocks to create quilts with rich visual variety.
Consider playing with negative space. Use a neutral background and float the blocks across the quilt top, allowing the eye to focus on the intricate design without being overwhelmed.
Add borders or sashing between blocks. This technique frames each Weathervane Quilt Block Pattern, helping them stand out individually while maintaining harmony in the overall quilt design.
Is the Weathervane Quilt Block Pattern beginner-friendly?
Yes, this pattern is suitable for beginners with basic sewing and piecing skills. Its construction involves simple units like squares and half-square triangles.
What is the typical size of a Weathervane Quilt Block Pattern?
Common sizes are 12 inches or 16 inches finished, but you can scale the block up or down based on your project needs.
What fabrics work best for this quilt block?
Quilting cotton is ideal. Choose fabrics with good contrast to highlight the block’s structure and enhance the overall design.
How do I press seams for the best results?
Many quilters press seams open for accuracy, but you can also press toward darker fabrics to help seams nest when joining rows.
Can I make a quilt using only this block?
Absolutely. The Weathervane Quilt Block Pattern looks stunning when repeated across an entire quilt top, either with consistent fabrics or with scrappy variations.
Do I need special tools to create this block?
A standard rotary cutter, quilting rulers, and a sewing machine with a quarter-inch foot are sufficient. A 45-degree or 90-degree triangle ruler can help with cutting half-square triangles more efficiently.
The Weathervane Quilt Block Pattern is a wonderful blend of tradition, creativity, and versatility. Whether you are new to quilting or an experienced maker, this block offers the perfect opportunity to play with color, shape, and symmetry.
By following the steps outlined in this guide—from fabric selection to assembly—you’ll be able to create a beautiful quilt block that can stand alone or become part of a larger quilt masterpiece. If you enjoyed this tutorial, please share your honest feedback in the comments.
Let us know what you think, share your experiences, and suggest any topics you’d love to see next. Your participation helps us keep creating valuable content for the quilting community!


