
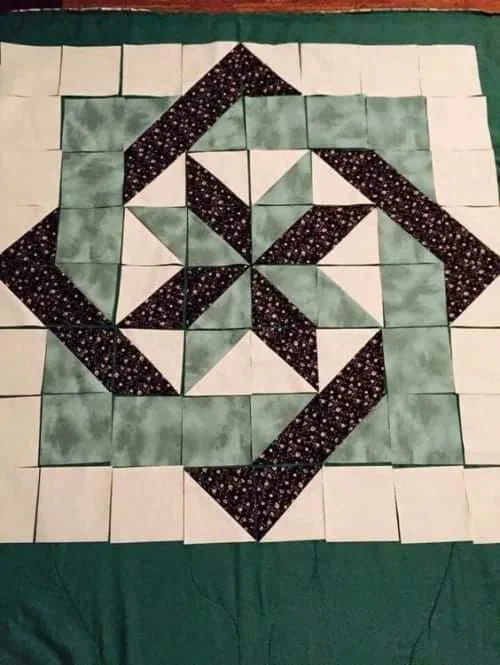
The Woven Star Quilt – Free Pattern is a beautiful and intricate quilt design that combines traditional quilting techniques with a modern twist.
This pattern features interwoven stars that create a stunning visual effect, making it a perfect project for quilters of all skill levels.
Whether you’re a beginner looking to challenge yourself or an experienced quilter seeking a new design, this pattern will guide you through the process of creating a memorable quilt that can be cherished for years.
Quilting has long been a cherished craft, and the Woven Star Quilt is no exception. The star motif has deep roots in quilting history, symbolizing light, guidance, and hope.
The “woven” aspect of this design adds a unique texture and depth, making the quilt not only a beautiful piece of art but also a functional and cozy addition to any home.
This pattern allows you to experiment with colors and fabrics, creating a personalized piece that fits your style.
In this article, we will provide a step-by-step guide to help you create the Woven Star Quilt from start to finish. Whether you are new to quilting or an experienced sewist, we’ve included clear instructions, tips, and tricks that will ensure your success. Let’s dive into the process of making this beautiful quilt.
1. Materials Needed for the Woven Star Quilt
Before beginning any quilt project, it’s important to gather all the necessary materials. For the Woven Star Quilt, you’ll need a variety of fabrics, tools, and supplies to bring the pattern to life. The right materials will ensure your quilt looks polished and holds up over time.
First, start by selecting your fabric. The Woven Star Quilt pattern typically uses a combination of solid and patterned fabrics. Choose contrasting colors that will allow the star shapes to stand out. A traditional color palette might include bold reds, blues, and whites, but you can also experiment with modern, neutral tones or pastels for a fresh, updated look. Make sure to buy enough fabric for the quilt top, backing, and binding.
Next, you’ll need quilt batting. This adds warmth and body to your quilt. Choose a medium-weight batting for a cozy, comfortable quilt that’s not too heavy. For the backing, you can select a fabric that complements the colors of the quilt top, or you can opt for a coordinating print that adds a touch of fun.
In addition to fabric, you will need basic quilting tools such as a rotary cutter, quilting ruler, and cutting mat. These tools help ensure that your fabric pieces are cut accurately, which is essential for piecing together the blocks and achieving a neat, well-fitted quilt. A sewing machine with a quarter-inch foot is ideal for piecing, and a walking foot will help when quilting the layers together.
Finally, don’t forget about quilting pins, thread, and a seam ripper (just in case). Thread in a color that matches or complements your fabric choices will work best, ensuring that your quilt seams are strong and durable.
With all your materials gathered, you’re ready to begin working on your Woven Star Quilt.
2. Cutting Your Fabric for the Woven Star Quilt
Once you have all your materials, the next step is to cut your fabric into the appropriate shapes and sizes. Precise cutting is crucial for ensuring that all your quilt pieces fit together perfectly, and the stars align as intended.
Start by cutting your fabric into strips that will form the star points and the woven bands. For the Woven Star Quilt, you will need to cut several pieces for each block: triangles for the star points and strips for the woven effect. The pattern will provide exact measurements for these cuts, so be sure to follow them carefully.
Using a rotary cutter and quilting ruler will make this process easier and more accurate. Ensure that each strip and triangle is cut straight, as uneven pieces can affect the overall look of your quilt. It’s a good idea to double-check your measurements before making each cut.
After cutting your fabric, it’s important to press the pieces. Pressing helps remove wrinkles and gives the fabric a smooth surface, which is essential for accurate piecing. For the Woven Star Quilt, press your seams to one side to reduce bulk and ensure that your pieces align properly when you start sewing them together.
Finally, organize your fabric pieces by color and type. This will make it easier to find the pieces you need when you start piecing your blocks together. Proper organization also saves time and keeps your workspace neat.
Now that your fabric is cut and pressed, you’re ready to move on to piecing the blocks for the Woven Star Quilt.
3. Piecing the Woven Star Blocks
The next step in creating your Woven Star Quilt is piecing the blocks together. This step involves sewing the fabric pieces to form the individual woven stars, which will later be sewn into rows to create the full quilt.
Begin by constructing the star points. This is done by piecing together the triangle pieces you’ve cut. Pay close attention to the angles of the triangles to ensure that the star points form sharp, defined edges. Sew the triangles together to form a star shape, and press the seams as you go.
Next, it’s time to add the woven strips. These strips are the key element of the Woven Star Quilt, creating the illusion of a woven pattern. Sew the strips together in alternating colors to form the woven sections. Be careful to align the strips evenly as you sew them, ensuring that the woven effect is consistent throughout the quilt.
As you complete each block, lay them out in a grid pattern to see how they will fit together. The beauty of the Woven Star Quilt lies in how the stars and woven sections interact, so it’s important to arrange your blocks in a way that emphasizes the design.
After completing all of your blocks, give them a final press. This will ensure that the blocks are flat and even, which is essential when it’s time to sew them together into rows. The key to a successful quilt is accuracy, so take your time to make sure that every block is perfect.
Once your blocks are pieced and pressed, you can begin assembling the quilt top.
4. Assembling and Quilting the Woven Star Quilt
The final step in making your Woven Star Quilt is to assemble the quilt top, quilt it, and add the binding to complete the project. This is where all of your hard work comes together, and you’ll see the beautiful pattern take shape.
Start by arranging your pieced blocks into rows. Once you’re happy with the layout, sew the blocks together to form the quilt top. Be sure to match the seams carefully so that the stars line up correctly. After sewing the rows together, press the seams to ensure that the quilt top remains flat.
Once the quilt top is assembled, it’s time to add the quilt batting and backing. Lay the quilt top on a flat surface and place the batting underneath. Then, add the backing fabric. Baste the layers together using pins or basting spray to hold everything in place.
Now, you’re ready to quilt! There are many different quilting techniques you can use, such as straight-line quilting, free-motion quilting, or stitch-in-the-ditch quilting. Choose a technique that suits your style and skill level.
After quilting, it’s time to add the binding. Cut strips of fabric for the binding, fold them, and sew them to the edges of the quilt to give it a finished look. Press the binding to ensure it lays flat, and your quilt is ready to be enjoyed!
FAQ: Frequently Asked Questions
1. What skill level is required for the Woven Star Quilt?
The Woven Star Quilt is suitable for quilters of all skill levels. Beginners may need extra time for piecing, but the steps are straightforward enough to follow.
2. Can I use different fabrics for the Woven Star Quilt?
Yes! Feel free to experiment with different fabric types and colors. The beauty of this quilt is that it can be personalized to suit your tastes.
3. How do I prevent puckering when quilting?
To prevent puckering, ensure that your fabric is properly pressed, and use a walking foot when quilting to evenly distribute the fabric.
4. How much fabric do I need for the Woven Star Quilt?
The amount of fabric needed depends on the size of the quilt you are making. The pattern should include fabric requirements for the quilt top, backing, and binding.
5. What is the best batting for the Woven Star Quilt?
A medium-weight cotton batting is ideal for this quilt, as it provides a good balance of warmth and softness without being too heavy.
6. How should I care for my finished quilt?
Wash your quilt on a gentle cycle with cold water and tumble dry on low or hang it to air dry to preserve the fabric and quilting stitches.
Join our VIP broadcast list and gain access to exclusive patterns, all for free. As a VIP member, you’ll receive the best patterns daily, delivered directly to your device. ✨📱 It’s a unique opportunity to stay up-to-date with the latest trends and designs, curated just for you. Don’t miss out on enhancing your projects and discovering new inspirations with the best patterns every day! 🎨🔝
Conclusion
The Woven Star Quilt – Free Pattern is a fantastic quilting project that allows you to create a beautiful and functional piece for your home.
By following the steps outlined in this guide, from selecting fabrics to quilting and binding, you’ll have a quilt that you can be proud of. Whether you’re a beginner or an experienced quilter, this pattern is a rewarding project to tackle.
If you found this guide helpful, we’d love to hear your thoughts. Please leave a comment with your feedback and any suggestions you may have for future quilting tutorials!


