
Pie Carrier Sewing Pattern

If you’re wondering how to create an apron from old jeans – free pattern, you’re in for a fun, sustainable, and rewarding DIY project.
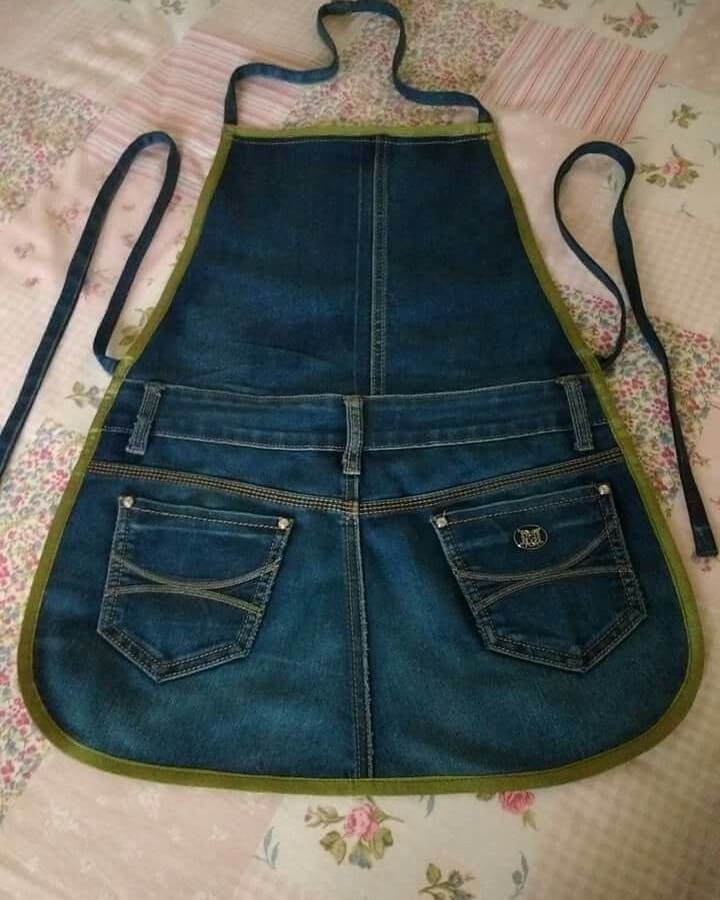
Repurposing old denim not only gives a second life to your favorite worn-out jeans but also creates a durable and stylish apron perfect for any type of crafting, cooking, or gardening. The charm of denim lies in its versatility and strength, making it ideal for creating long-lasting accessories that also look fashionable.
Many people have old jeans tucked away in their closets, too precious to throw away yet no longer wearable. This project is the perfect excuse to turn them into something practical and creative.
With just a few basic tools, some time, and a touch of inspiration, you can learn how to create an apron from old jeans – free pattern style. It’s also a fantastic beginner sewing project that doesn’t require a high level of expertise or expensive materials.
By following this easy and human-centered guide, you’ll not only end up with a unique apron but also gain a sense of accomplishment and contribute to sustainable fashion.
In the sections below, we will break down the steps to transform those old jeans into something useful and fun. Whether you want a gift idea, a kitchen apron, or a tool belt for your garden, this pattern has you covered.
Before you start crafting your apron from old jeans, make sure you gather everything you need. Start with a sturdy pair of denim jeans that are either too small, too large, or simply worn out at the knees.
Lay the jeans flat and use scissors or a rotary cutter to remove the legs. Most aprons use the back portion of the jeans where the pockets are, as they make for convenient built-in storage.
Have your sewing machine or hand sewing tools ready, including needles suitable for thick denim. You’ll also need pins, chalk or a fabric marker, and some bias tape or ribbon for the ties.
Washing the jeans before cutting helps prevent shrinkage and removes any dust or residue. If your denim is too stiff, a quick run in the wash with fabric softener can make it more manageable.
Optional items like patches, lace, or contrasting fabric can be added for extra flair. This is your chance to make the apron your own with decorative touches.
Check that your workspace is clean and well-lit. Having a designated area to cut and sew will make the process smoother and more enjoyable.
To begin, take the seat section of the jeans and cut a large rectangle, including the back pockets if desired. This will form the main body of your apron.
Make sure to trim the edges to your preferred shape. Some people like a more traditional rectangular shape, while others prefer curves on the sides.
If you’re using both pant legs, they can be sewn together side-by-side to create a longer apron. Don’t forget to trim excess seams for a cleaner look.
Use a chalk marker to sketch out your apron shape on the wrong side of the fabric before making permanent cuts. This helps avoid mistakes.
Once the shape is cut, iron the fabric to flatten seams and folds. A smooth surface makes sewing easier and more accurate.
Don’t discard the denim scraps! They can be used for making pockets, trims, or other creative embellishments.
Now it’s time to stitch your apron from old jeans together. Start by hemming the edges of your cut apron body to prevent fraying and to give it a polished look.
Attach a strip of bias tape or fabric around the edges for a decorative and secure finish. Choose colors that contrast or complement your denim.
Measure and cut waist ties and a neck strap using either leftover denim, ribbon, or cotton straps. Sew them securely to the top corners and sides.
To make the apron adjustable, you can add D-rings to the neck strap or even sew on snap buttons. Customization is key!
If you want extra pockets, use denim scraps or other fabric to add square or angled pockets to the front. Sew them tightly at the edges.
Reinforce all points of stress, especially where the straps meet the body of the apron. A double stitch or zigzag stitch can help make it stronger.
This is where you can get creative. Turn your basic apron from old jeans into a masterpiece with embellishments.
Use embroidery to add names, quotes, or fun motifs. Even simple cross stitches can make a big impact.
Add lace, ribbon, or contrasting fabric to the edges to soften the rugged denim appearance. This works especially well if gifting.
Attach decorative buttons or rivets, especially if you want a more industrial or vintage look.
Repurpose the front zipper or fly area of the jeans as a quirky center design element. It’s both humorous and stylish.
Don’t forget paint! Fabric paint lets you stencil or freehand designs that reflect your personality or theme of the apron.
Can I make this apron without a sewing machine? Yes, it’s possible to make this apron with hand-stitching if you use a heavy-duty needle and thread suitable for denim. It will take more time, but the result can be just as good.
How long does it take to complete one apron? On average, it takes 1 to 2 hours, depending on your sewing experience and how much customization you want to include.
What can I use if I don’t have bias tape? You can use strips of cotton fabric, ribbon, or even soft rope. Just make sure to fold and sew the edges neatly for comfort and durability.
Are these aprons washable? Absolutely! Since they’re made from old jeans, they can be machine washed. However, always turn them inside out and avoid harsh detergents.
Can children help with this project? Yes! Older children can assist with tracing, pinning, and even basic sewing under supervision. It’s a great family activity.
Can I make a full-body apron instead of half-body? Yes, by combining denim from both legs and waistband sections, you can easily extend the apron into a full-body version.
Learning how to create an apron from old jeans – free pattern is not only a fun and sustainable project, but it also brings new life to clothes that would otherwise be thrown away. With some basic tools and a little creativity, you can create a unique and functional apron tailored to your personal style. Throughout this article, you’ve discovered how to prepare materials, cut and shape your apron, sew it securely, and add personal decorative touches.
Whether you’re a beginner or a seasoned DIY enthusiast, this tutorial offers a valuable and rewarding experience. Now that you’ve completed your apron, we’d love to hear your thoughts! Leave a comment with your experience, any suggestions you have, or share your own creative modifications. Your feedback helps inspire others in the crafting community!


